
Step-by-Step Guide to Building Your Raspberry Pi Cluster
This guide will walk you through setting up a Raspberry Pi cluster, including configuring static IPs, disabling Wi-Fi, enabling cgroups, and installing k3s.
Prerequisites:
- Raspberry Pi boards (3 or 4 recommended)
- MicroSD cards
- Power supplies for each Raspberry Pi
- Ethernet cables
- Network switch (if using Option 2)
- A computer to configure the Raspberry Pis
- Raspberry Pi OS (64-bit Lite version recommended)

Step 1: Install Raspberry Pi OS
- Download the Raspberry Pi OS (64-bit Lite) from the official Raspberry Pi website.
- Flash the OS onto each microSD card using a tool like Raspberry Pi Imager, BalenaEtcher, or
dd.
Step 2: Initial Setup (per Pi)
- Insert the microSD card into a Raspberry Pi.
- Connect a keyboard, mouse, and monitor (or use SSH after enabling it).
- Boot up the Raspberry Pi.
- Follow the initial setup prompts (change the default password, set the hostname, etc.). If you plan to use SSH, you can create an empty file named
sshin the boot partition of the SD card before booting it up for the first time. This will enable SSH. - Open a terminal.
- Update and upgrade the system:
sudo apt update sudo apt upgrade - Install
dhcpcdif it's not already installed:sudo apt-get install dhcpcd
Step 3: Set Static IP Address for the Master Node
Choose one of the following options based on your network setup:
- Option 1: Each Raspberry Pi Connected to the Router
- Open the
dhcpcd.conffile:sudo nano /etc/dhcpcd.conf - Add the following lines to the end of the file, replacing the placeholders:
interface INTERFACE_NAME static ip_address=YOUR_STATIC_IP/24 static routers=YOUR_GATEWAY_IP static domain_name_servers=YOUR_GATEWAY_IP # DNS same as router IPINTERFACE_NAME: e.g.,eth0for wired,wlan0for Wi-Fi. You'll be disabling Wi-Fi later for the master, so useeth0.YOUR_STATIC_IP: e.g.,192.168.1.100. Choose an IP address outside of your router's DHCP range.YOUR_GATEWAY_IP: Your router's IP address (e.g.,192.168.1.1).
- Save and exit: Ctrl+X, then Y, then Enter.
- Restart
dhcpcd:sudo systemctl restart dhcpcd - Verify the IP address:
ip addr
- Open the
- Option 2: Using a Network Switch
- Master Node Configuration:
- Open
dhcpcd.conf:sudo nano /etc/dhcpcd.conf - Add the following lines:
interface eth0 static ip_address=192.168.50.1/24 - Save and exit.
- Install
iptables(if not installed):sudo apt install iptables - Enable internet forwarding from
eth1(your internet-connected interface) toeth0(the switch):sudo iptables -t nat -A POSTROUTING -o eth1 -s 192.168.50.0/24 -j MASQUERADE - Install
iptables-persistent:sudo apt install iptables-persistent -y - Save current IPv4 rules (and likely No for IPv6):
- To save iptables rules in the future:
sudo netfilter-persistent save - Restart the network service:
sudo systemctl restart dhcpcd - Reboot the Raspberry Pi:
sudo reboot
- Open
- Node Configuration:
- Open
dhcpcd.conf:sudo nano /etc/dhcpcd.conf - Add the following lines:
interface eth0 static ip_address=192.168.50.2/24 # Use .2 for the first node, .3 for the second, etc. static routers=192.168.50.1 # Gateway is the master node static domain_name_servers=192.168.50.1 8.8.8.8 # Master IP and Google DNS - Save and exit.
- Check network connections:
ip r
- Open
- Master Node Configuration:
Step 4: Disable Wi-Fi on the Master and then Nodes (optional but improves network bandwidth and security and declutters the routers network)
- Open the
config.txtfile:
<aside> 💡My file on the 64bit version moved to - sudo nano /boot/firmware/config.txt</aside>sudo nano /boot/config.txt # 64 bit version - sudo nano /boot/firmware/config.txt - Add the following line:
dtoverlay=pi3-disable-wifi - Save and exit.
- Reboot the Raspberry Pi:
sudo reboot
Step 5: Enable Cgroups (Master & Nodes)
- Open the
cmdline.txtfile:
<aside> 💡My file on the 64bit version moved to - sudo nano /boot/firmware/cmdline.txt</aside>sudo nano /boot/cmdline.txt 64 bit version - sudo nano /boot/firmware/cmdline.txt - Add the following to the end of the line:
cgroup_enable=cpuset cgroup_memory=1 cgroup_enable=memory - Save and exit.
- Reboot the Raspberry Pi:
sudo reboot
Step 6: Install k3s
- Install
k3sup:curl -sLS <https://get.k3sup.dev> | sh sudo install k3sup /usr/local/bin/ - Master Node:
- Set the
MASTER_IPenvironment variable:
e.g., export MASTER_IP=192.168.50.1 ( .1 as first on the subnet if using network switch)export MASTER_IP=YOUR_MASTER_IP - Install k3s:
k3sup install --ip $MASTER_IP \\
--user pi \\ # Replace with your username
--k3s-channel v1.24 \\ # Or the version you want
--local-path /tmp/config
- Set the
- Node(s):
- Set the
AGENT_IPenvironment variable:
e.g., export AGENT_IP=192.168.50.2export AGENT_IP=YOUR_NODE_IP - Join the node to the cluster:
k3sup join --ip $AGENT_IP \\
--user pi \\ # Replace with your username
--server-ip $MASTER_IP \\
--k3s-channel v1.24 \\ # Or the version you want
--server-user pi # Replace with the master node username
- Set the
SSH Key Issues:
- If you get an SSH error, generate SSH keys on the master (if needed):
ssh-keygen - Copy the SSH key to the target Raspberry Pi:
Replace username with your Raspberry Pi’s username Replace target_ip_address with the Targe Raspberry Pi’s IP Addressssh-copy-id -i /home/{username}/.ssh/id_rsa.pub <target_ip_address>
- Configure
kubectl:- On the master node, set the
KUBECONFIGenvironment variable:export KUBECONFIG=/tmp/config - Use the default context:
kubectl config use-context default
- On the master node, set the
Step 7: Verify the Cluster
- On the master node, check the cluster status:
orkubectl get node -o widesudo kubectl cluster-info
What's Next?
Congratulations! You've built your own Raspberry Pi cluster. Here are some ideas for what you can do with it:
- Run containerized applications.
- Deploy a web server or a database.
- Learn about distributed computing and orchestration.
- Set up a home automation system.
A Raspberry Pi cluster is a versatile tool for learning and experimentation. Have fun exploring the world of distributed computing!
![]()
Written by Matthew Betts
Matt Betts
Founder • Lead Developer • Technical Consultant
Over 12 years building software and guiding teams. I work hands-on with founders to shape clear, reliable systems across web, mobile, and IoT.
Check out my LinkedInInsights
Recent articles from Wizard Dev House

Ditch the Desktop, Embrace the Pi: Your New Favorite Dev Companion!
Let's talk web development. For years, the drill has been pretty standard: whip up some files, open 'em in Chrome, maybe fire up an Apache, …
Read More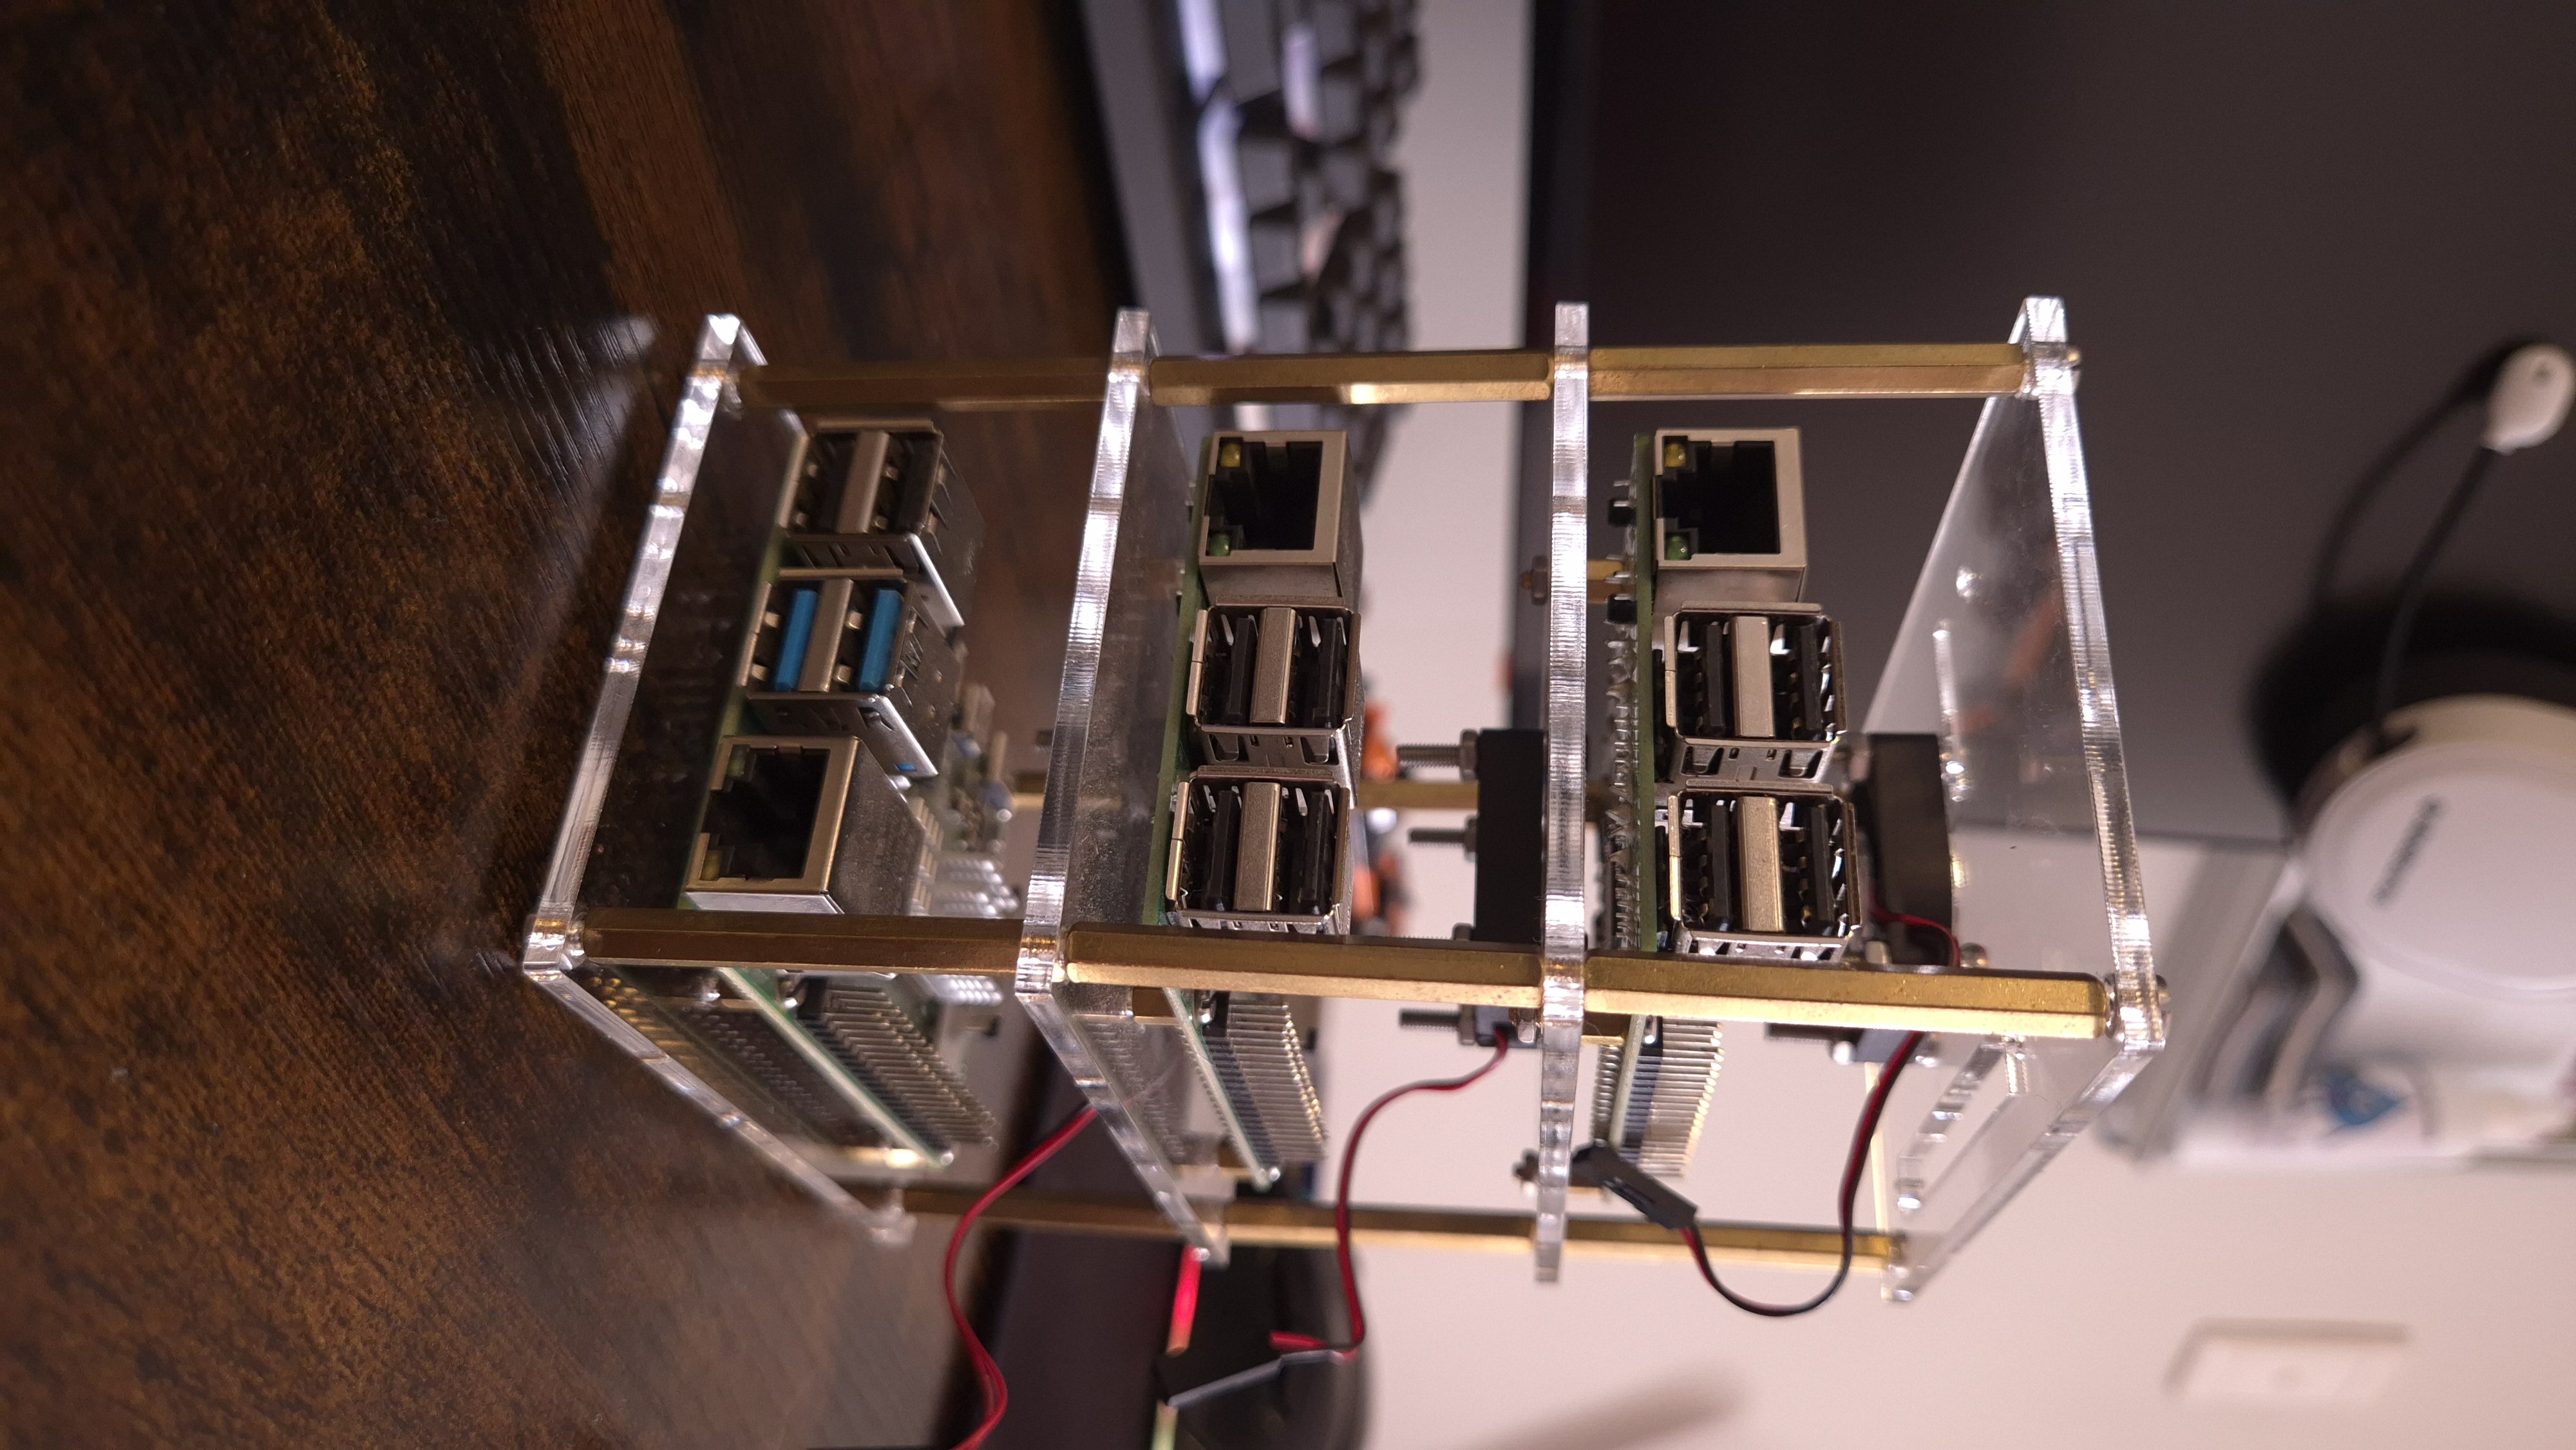
Lego for Geeks: Building a Raspberry Pi Kubernetes Cluster
My journey into the world of tiny computers and lightweight Kubernetes. It was messy, occasionally frustrating, but ultimately incredibly re…
Read More
Vibe Coding: Shortcut to Genius or Highway to Hell? (A Grumpy Old Dev'…
Alright, digital architects and code-slingers, let's talk about the latest shiny object distracting developers: "Vibe Coding." You know the …
Read MoreStep-by-Step Guide to Building Your Raspberry Pi Cluster
This guide will walk you through setting up a Raspberry Pi cluster, including configuring static IPs, disabling Wi-Fi, enabling cgroups, and…
Read More